Cursed By The Laws of Physics:
So for my final project I tried my first attempt at vacuum pressing a skateboard deck. It’s my first time working with 1/16″ Canadian maple veneers. The veneers came from Roarockit and were very reasonable. The more veneers you order at once the less they cost (at the time of writing this post they start at $25+ shipping for a single 7 layer street deck set). As I mentioned in my last post there are 3 types of veneer. Face, cross-grain and core. The standard for 7 layer skateboards is to use 2 face sheets, 2 cross-grain and 3 core sheets. This creates a very strong skateboard as it uses a cross-grain to add strength to the laminated deck. For my first attempt I thought I should start with the lynch pin of my project- the twisted middle deck. This involved the idea of laminating and hand bending veneer around a foam tube in order to create a full twist in the board to simulate in the form the course a skateboard travels during a kick flip. The first step is to find my 7 layers from the sheets of veneer. I picked out two similar face sheets to put on either end and then 3 core sheets and two cross-grain sheets.

The sheets are all slightly different width and length so I needed to trim them to match. I used a sheet of pre-cut grip tape as my guide for length and a street deck I owned as a width measurement. Cutting the veneer is really easy. Since each sheet is only 1/16″ you can score it with a straight edge and a utility knife and then snap the excess off using a table edge for leverage.

Once I had all the veneers squared and cut to size. I stacked them to check my alignment and to make sure the grip tape matched as well.
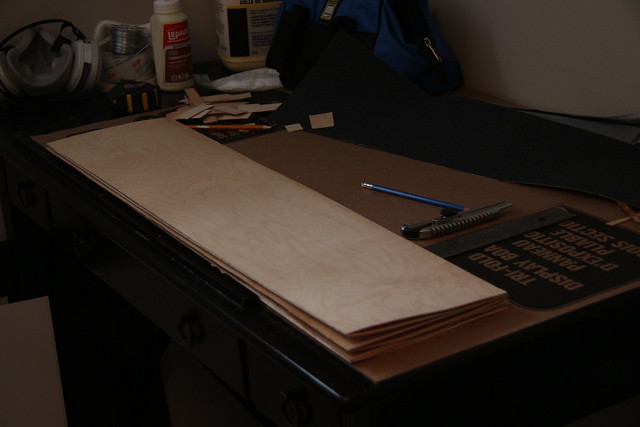
A nice neat stack of 7 3/4″ x 33″ maple veneers.
I wanted to grip the top face before I made the bend in the deck as I thought it would be fairly difficult to grip a full spiral afterwards. Normally you wouldn’t add grip tape until the deck was finished because you want to add the varathane or polyurethane to water proof the wood first. Since this was not going to be used outside the gloss is more for aesthetics than function so it could be gripped before lamination. Once I added the grip tape to the top face sheet I started gluing the layers for lamination. I read that too much glue can cause bubbling and not enough can cause the dreaded delamination. So I went to the source here is a video from Roarockit about how much glue to use:
The gluing needs to take place fairly rapidly as you don’t want the glue to set before your deck is put into the TAP (thin air press). Once all the veneers were glued I put the back from the grip tape on top to make sure the grip didn’t tear up the inside of the TAP. Then I put an elastic around each end to help keep the veneers squared. I put the whole thing in the bag with the breather net on top and used the hand pump to vacuum out the air. So far so good. A few layers may have had a bit too much glue but I won’t be able to tell until the pressing is finished.

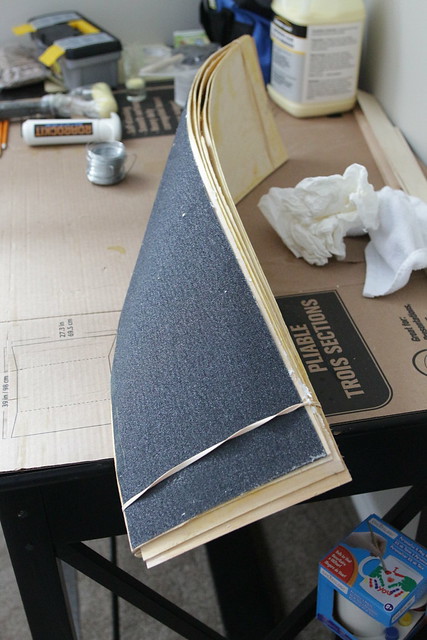
Once I had a good vacuum and the pressure seemed ok I started to try and bend the wood around the foam. With a single sheet of veneer and a little bit of work I could wrap it 360º around the tube. Now with all 7 layers in the bag it was more difficult. I could only get about 180º of wrap. That shouldn’t be a problem for my project as I will just bend the other decks to make up the difference. Once I had it wrapped I used tie down straps to hold the curve in place.

This is where the laws of physics may have become my undoing. In order to wrap more than one sheet around the tube form some sheets pushed out at the ends and created a bit of a step pattern. At this point I have accepted that I may have to find the last place where everything was squared and cut each end to that point. Not a big deal. I’m still feeling pretty good. I check my seal and it still seems to be holding quite well. I go back and check 15 minutes later. Still good. I check once more 30 minutes after that there has been a little pressure loss but only one pump worth so no big deal. I then leave my bag over night and open it in the morning. BAD NEWS! The form has slipped and the valve fell off the bag. The pressure didn’t stay overnight so there are gaps in the lamination. Also once I have the board out of the bag I can see that around the curve the veneers are no longer touching. Putting the curve in the veneers has caused space between each layer.
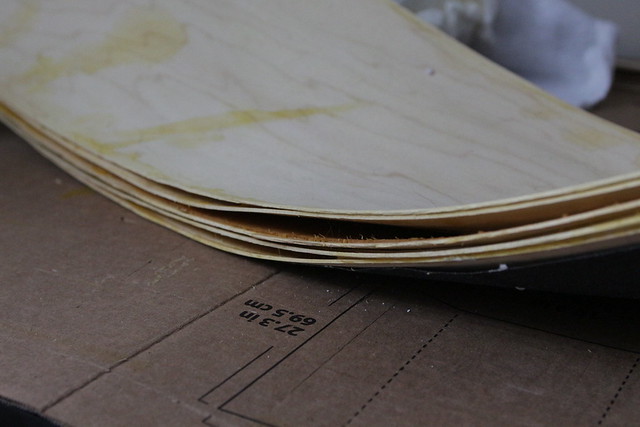
Also when I take the deck out of the TAP there is some definite spring back (the idea that the wood wants to stay flat and not be forced into a curve0. Some of the spring back could be because the pressure was lost but some is for sure just the physics of bending straight wood. My 360º curve turned into a 180º turned into a 90º curve.
This puts a kink (no pun intended) into my final shape for my piece. All is definitely not lost but I may need to scale back and rethink. I know I can still render the form to show function while actually removing the function of the board it may just not be the form of a kickflip anymore. For the next board I think I’ll use a custom foam mold design to create the form.
Again I will try and shape the mold to show form rather than for function. For now back to the drawing board.
Stay Tuned!

I like reading your blog…and since you are venturing into my current profession I will say one thing. Maple is VERY hard. It’s one of the hardest and densest woods out there and as such is very very difficult to bend if you want to make different shapes. Probably the only thing that went wrong in your glue-up is that the pressure was lost…maybe not enough glue too. You can never have too much glue! 😛 Good luck with the reccuperation. If you ever want to re-try your experiment, I would suggest using Ash instead of maple. It’s wonderful for bending.
LikeLike