Patience Young Grasshopper
So at the end of the last post for my cruiser build I was sent away to print off a perfectly symmetrical digitally designed template for my skateboard. I went to Adobe Illustrator and created an art board the dimensions of my laminated hardwood board. From there I added grid lines to show me the width of my skateboard and the centre line using these lines I created one side of my skateboard shape with the illustrator line tool. I curved the line until I was happy with the shape it formed. Then I duplicated and mirrored that line in Illustrator. I had both lines meet at the top of the centre line along the bottom I created a flat line for the tail. This created a perfectly symmetrical curve on each side. Then because I’m a visual guy I pulled the woodgrain out of a photo and dropped it into the file so I could see approximately what I would have when I cut my shape out of my hardwood.
This is the Illustrator file:

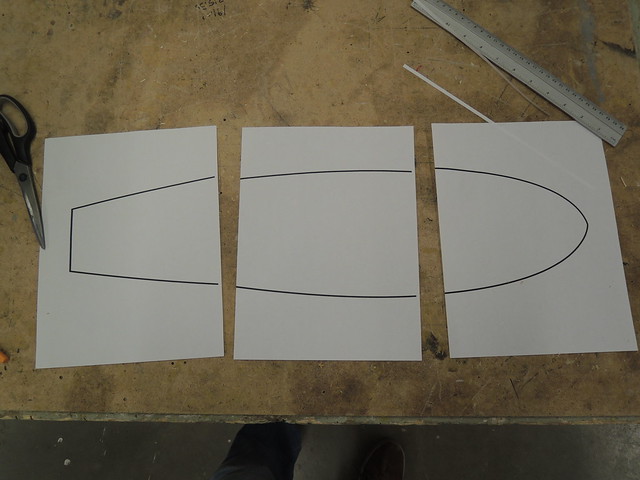
So I printed out my template using the tiled printing option in illustrator. This allows me to print the template full size but on standard letter paper (8.5 x 11″). For more information on how to print tiled in illustrator check out this link. Once I printed it out this is what it looked like:
I cut it out and glued it to a piece of scrap wood. I used a bit of wood glue just around the edges so that the paper wouldn’t shrink or crinkle. I used a very thin bead of glue and the pressed it on so that the glue pushed outwards.

Then I took the scrap wood and the template to the bandsaw and attempted to cut it out. That came with a bit of a learning curve and I’m glad I didn’t take my hardwood straight to the band saw because I would’ve been starting over. The key to the bandsaw, in my humble opinion, is twofold. First- It can be a very precise tool in the hands of a skilled operator. However if you are not a skilled operator leave yourself some room- it’s easy to sand off the rough cuts after. Second- If you have any experience with a sewing machine the band saw operates in a very similar manner. Think of the saw as the needle of the sewing machine and run your wood through the way you would run fabric through a sewing machine. Once I figured out that connection I was much better at using the bandsaw. Once my scrap wood template was cut out and sanded it was time to attach it to my hardwood board. If I was better at the band saw I would’ve left tabs on my template. this time however Jessie showed me a way to create and screw on little finger tabs. In the future I would cut the tabs in the template and save a step.
The paper side of the template:
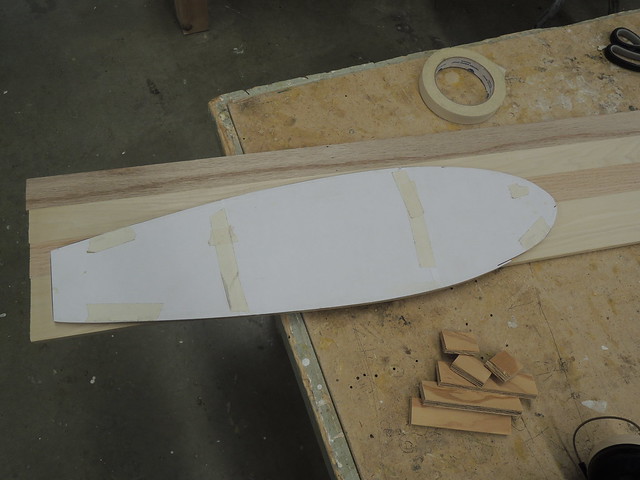
The Back of the template:
The Template with the fingers attached:

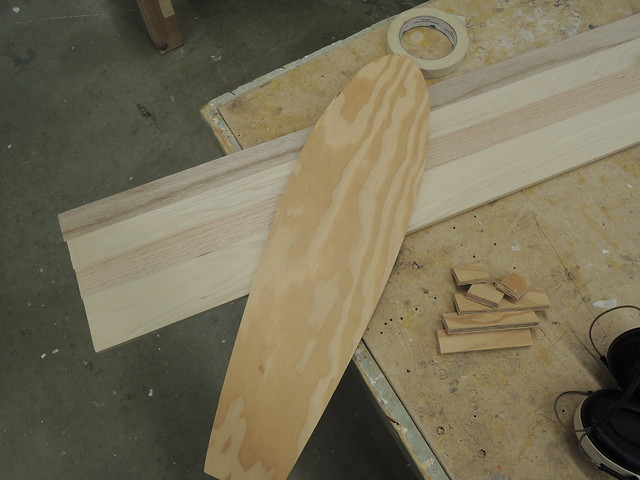
Now that the template and fingers are ready to go. I marked the centre line of the template so that I could use it to make sure that my joints of hardwood run parallel through the deck. I think this is a crucial step. If the lines are off then the whole aesthetic of the board will feel skewed and sloppy. Once I lined up the template I attached it to the hardwood. I traced the template onto my hardwood. Then I detached the template and took the hardwood to the bandsaw. The second time using the bandsaw was much easier and I didn’t make any crucial mistakes. I cut the rough shape of the template out of the hardwood on the bandsaw. This time I was careful and made sure to leave myself a bit of room so as to not accidentally cut into the boards that will form the finished deck. Then I reattached the template. I took the template to the sander and removed a little bit more of the excess hardwood around the template. Then it was time for the router:

I worked slowly and gently to take the excess edge of the board with the router. It went great. This router bit has a bearing at the top so once you have routed enough of the wood away the bearing hits template and allows you to finish a nice edge while running the wood along the bit. The bearing prevents you from taking off too much wood and allows you to perfectly follow your template. The first side was smooth sailing and went great. The second side caused my a bit of an issues. The router grabbed a piece of a cut that I didn’t see under the template and split one of my pieces of hardwood. Luckily I was working slowly and gently and caught it before it sent the whole chunk flying. I showed Jessie and we did some emergency surgery.
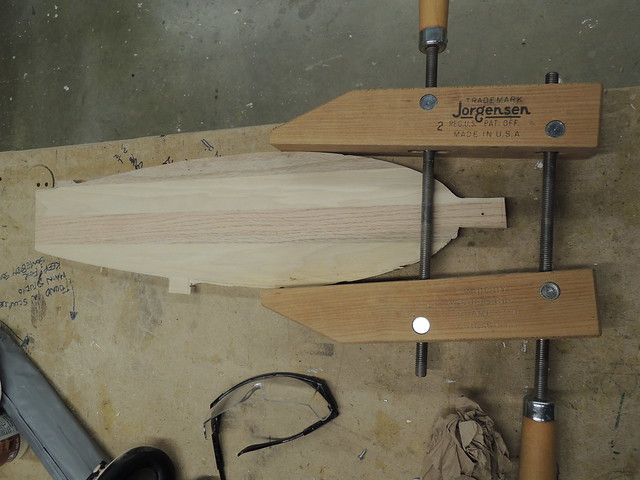
Some gluing and clamping and I think we should be fine. In the long term it’s nothing a little sanding won’t fix. However it means 24 hours in a clamp… Another test of patience. I was hoping that this would be the last post in the shop with this board and all that would be left was finishing… Oh well back to the router tomorrow. It also gives me some time to test a couple of my finishing ideas. Hopefully the next hardwood cruiser post will include the finished product. Stay Tuned!
Skills Acquired:
- Template Construction √
- Tiled Printing in Illustrator √
- Band Saw Skills √
- Router Skills √
- Patience…

2 thoughts on “The Hardwood Cruiser Build (Part 3)”